How To Built A Carport
In Summer 2009 we bought a van. It was a 2005 Dodge Grand Caravan SXT, and I loved the thing! The Stow’nGo seating was=s brilliant, allowing you to convert the back from a 4’x8′ loading area into seating for five people faster than I could explain here how it’s done. However, the van was a little too long for our garage, and we were dreading having to scrape ice off the windows in winter. That’s why we decided to built a carport at the side of the house. This article explains how my dad and I built the carport from scratch with materials we bought at Lowes for about $500. We designed the structure ourselves, without using any pre-designed plans. We found it easy enough to do, but we had some previous experience in creating a kids play fort and a pergola. Please feel free to use this article to get some ideas for your own building projects, but do so at your own risk. A carport like this could also be very useful to store a boat or a camper, or even just to store firewood.
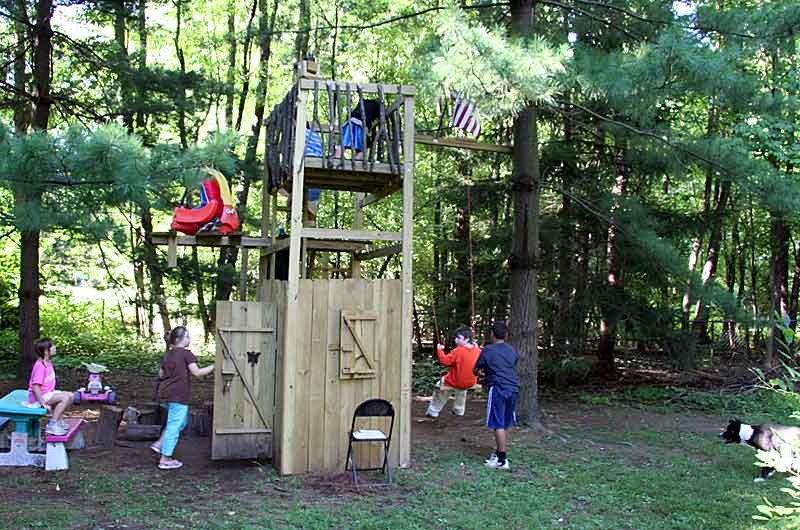 This is the Kids Play Fort we built earlier.
I didn’t bother taking pictures of the area immediately before we started with the whole project, but when we first moved into the house, we had a 4′ black chain-link fence put in for our dog Jody, and the gate was right were we now put the carport. Also, in 2008 we were forced to cut down a mature maple tree on that side of the house that had died due to girdling roots. I took some pictures on that occasion.


Before we started building the carport, my dad and I removed the gate, and had some friends pick up the plants from that area for their garden. Unfortunately the conifer was too large to move, and we had to chop it down. The huge blue spruce also needed some serious pruning of lower branches to make space for the carport.
Then we cheated a little in that we had Tallmadge Asphalt and Concrete come in and do the earth work for us, and pour a concrete base. The job cost close to $4000, but they did great work. In fact, it was amazing to see the way those folks worked together as a team. There wasn’t much talk going on among them while they worked, but everybody knew the job so well that they could anticipate what’s needed, and everything was just at the right place when it should be there. Everybody was pulling their weight, and eager to pitch in when and where another hand was needed. I’ve done a lot of management courses and considered these kind of issues as part of the policy work I did in Australia, but rarely have I had the opportunity to see such a well working team in action.


My Dad had professionally laid pavers in his job as landscape gardener, and we have previously done little paving projects together. We had considered paving the area ourselves instead of having concrete poured, but I was glad we didn’t go the DIY route for that part of the project. Tallmadge Asphalt and Concrete moved a large amount of soil in no time using their Bobcat, and they brought in 14 tons of gravel to level the ground. We had enough work on our hands moving the soil back, but more of that later. If you want to save money, you could just built concrete foundations for the four support columns of the carport, and leave the bottom as dirt or put down some gravel, but in our case I wanted the concrete floor of the carport to match the driveway.
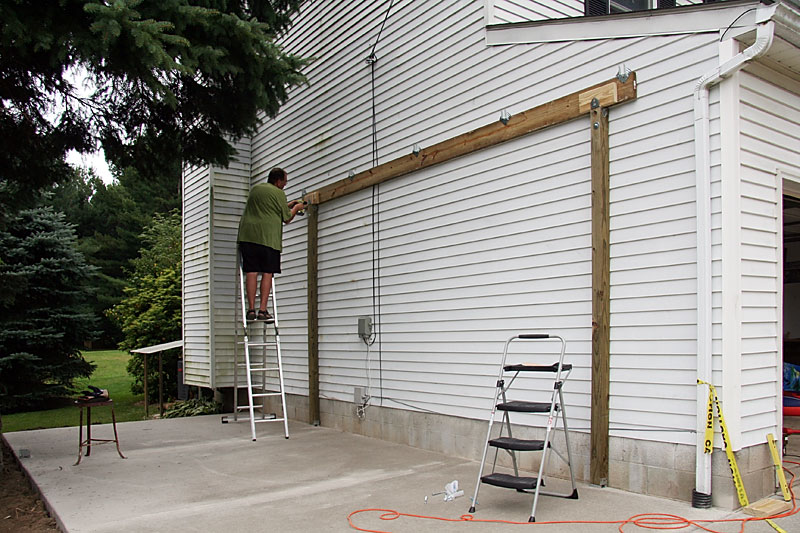
With that done, building the carport seemed a breeze, since we already had a level base, and even the feet for the 4×4 columns were in place. We anchored two of those 4x4s to the house, using threaded rods that went all the way through the wall. We used 4x4x10s along the house that we shortened a little to fit the reduced height of the wall at the very front of the house. Away from the house we used 4x4x8s to get some slope into the roof.
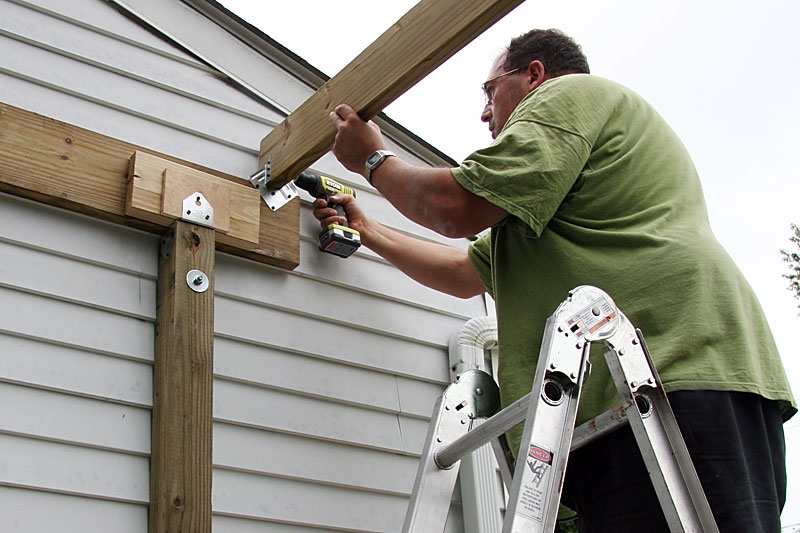
On top of the vertical 4x4s, we placed a single horizontal 2x8x16, wedging it into the brackets using some scrap lumber (a piece of a 2×6 and some 1/2″ plywood. We also attached the 2x8x16 to the wall using 4″ drywall screws to prevent warping of the 2x8x16, but the weight of the roof is entirely supported by the 4x4s.
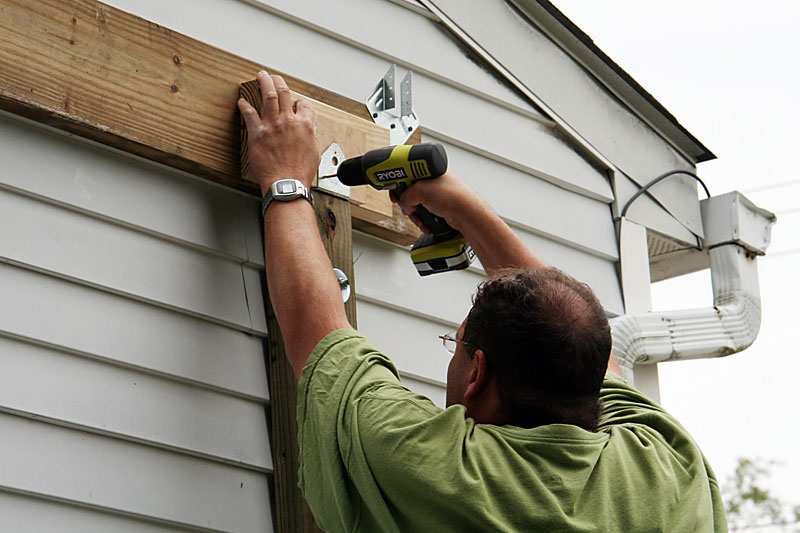
Here you can see me attach the 2x8x16 to the brackets on top of the 4x4s. The brackets for the rest of the roof construction are already in place as well – easier to put in place with the 2x8x16 still on the ground than later on the ladder. Luckily, I had my dad there to remind me of of little things like this! You can also see the 12V Ryobi cordless drill I treated myself to for this project. It was only about $80 including a charger and two rechargeable batteries, but did an awesome job.
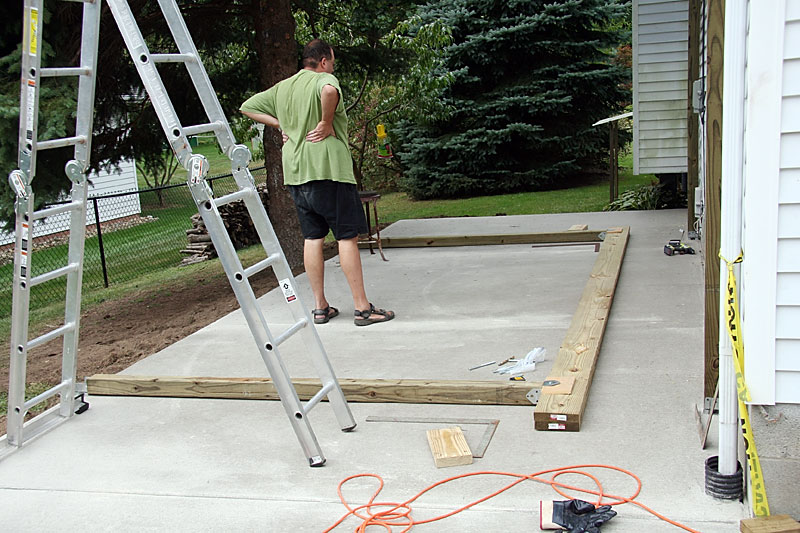
For the side of the roof construction away from the house we used two 2x8x16s, and we assembled that whole part of the structure lying flat on the ground. Pieces of 1/2″ plywood were needed to bring the two 2x8x16s up to the width of a 4×4 and the associated bracket. We also put the brackets for the rest of the roof construction on the 2x8x16s while they were still lying on the ground.


Then came the most tricky part of the whole project, and I don’t have pictures of that, because with my Dad and I as the only two people around, we couldn’t spare a hand to take photos. We raised the whole construction of 2x8x16s and 4x4x8s up, my Dad lifting on one end and I on the other. The plan was that my Dad would hold on to the thing on one end to hold it up, and I would climb up the ladder with a 2x6x12 to connect the newly raised part of the carport with the part that was firmly attached to the house, thereby giving it some stability. However, the newly raised part was so wobbly that my Dad couldn’t hold it up by himself. Luckily there was a huge blue spruce on hand on one side, and we leaned the thing against it, even though that meant a pretty crooked setup for a while. Then my Dad could hold up the other side, and I went up the ladder with a 2x6x12 on the side of the blue spruce to connect the two parts of the carport on that end and straighten things out a little. That gave it some stability, and my Dad managed to then straighten the whole construction out using a level, while I connected the other end with another 2x6x12. We couldn’t have done this on a windy day, and we hurried to cut two pieces of 2x4s that we could use as diagonal brackets to enforce the right angle in the wall of the carport away from the house. The stability that these two pieces of lumber gave the whole construction needs to be experienced to be believed. After they were in place, the rest of the project seemed like a piece of cake.
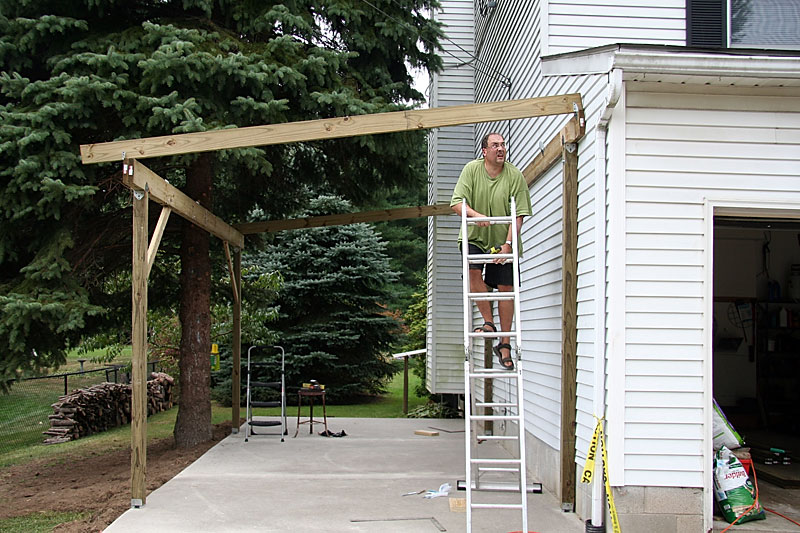
I just put all the missing screws in the various brackets where I had just secured the lumber temporarily with one or two screws, and then I had a seat to catch some breath after all the excitement.

After that we put the remaining three 2x6x12s in place, which meant another gazillion screws. Did I mention that cordless drill did a very fine job?
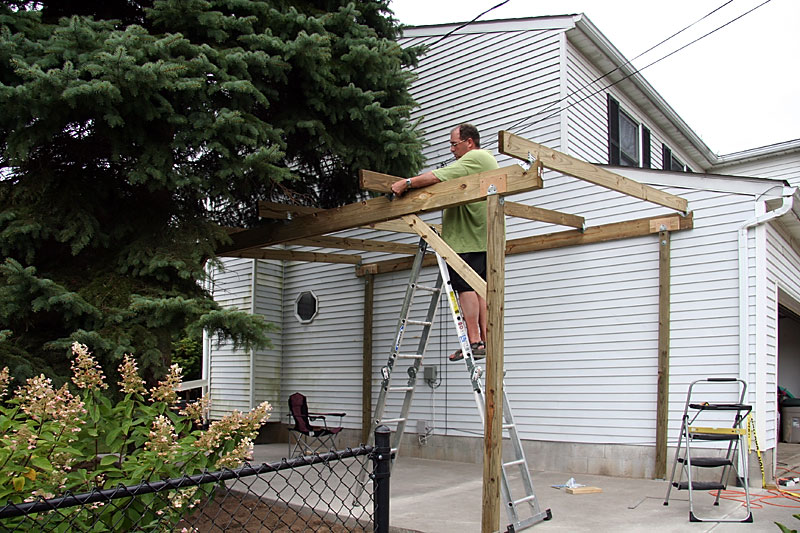
After lunch and a change of shirt, we started putting 2x4x8s on top on the 2x6x12s. Since they have virtually no weight to carry, we installed them lying flat on the other lumber, which allowed us to put 2.5″ drywall screws all the way through the 2x4x8s into the 2x6x12s. The little cordless drill did that effortlessly without the need for pre-drilling.

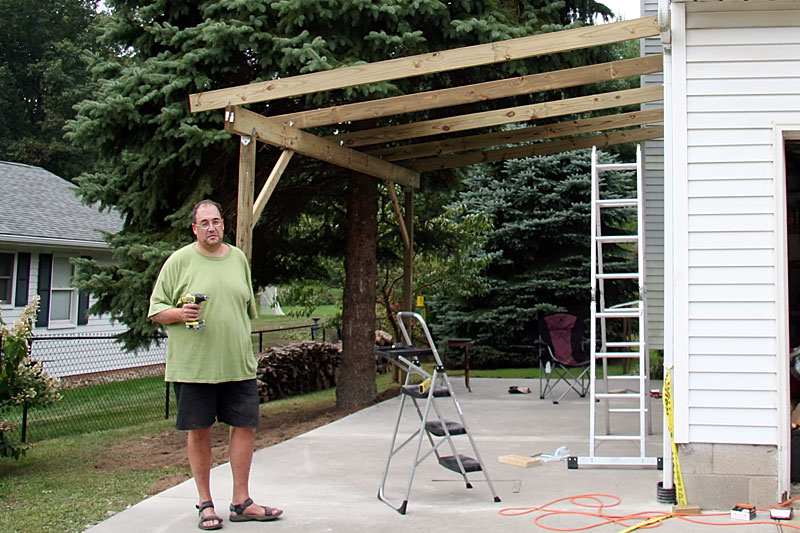
In Germany it is unthinkable to complete any building project without drinking beer. My dad always says any structure built without drinking beer would surely not last. So here we are enjoying a can of Milwaukee’s Best. I am embarrassed to say it, but it’s my Dad’s favorite beer in the US – and actually a very fine thirst quencher after some hard work on a hot and humid day. Needless to say this wasn’t the only can we enjoyed while building the carport.

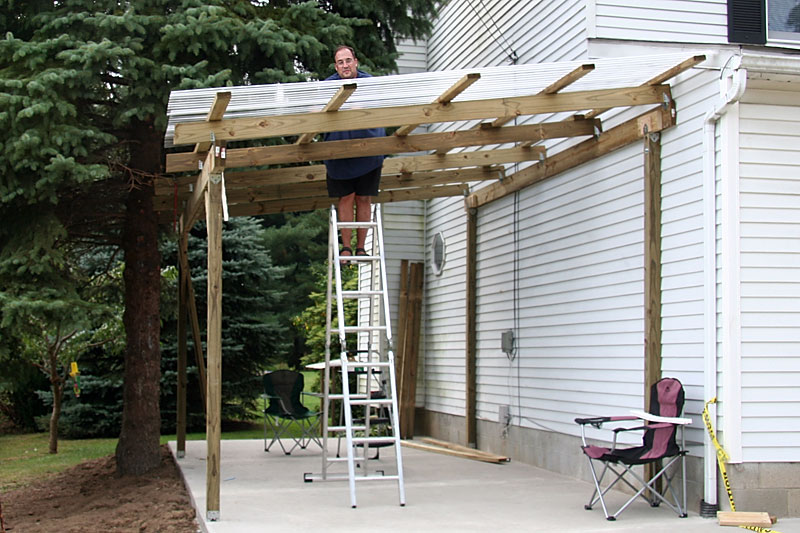
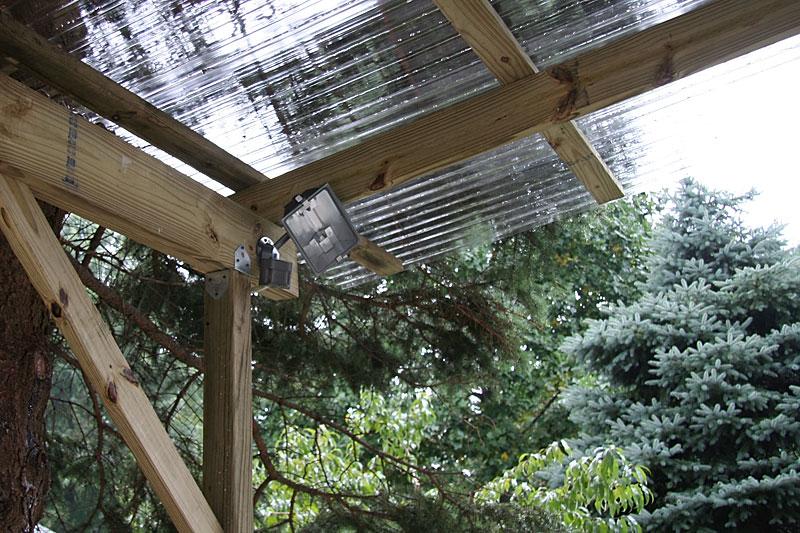
The transparent roofing panels we used measured 12′ by 26″ and were $30 per piece, making them by far the most expensive part of the carport itself (we won’t talk about the concrete in this context). The roofing panels rest on Styrofoam strips that I almost did not buy until another customer convinced me of their usefulness while we were loading the van in the Lowes parking lot. Thank you, if you happen to come across this article! These strips, albeit not cheap, give excellent support for the panels, and I am sure will prevent them from cracking over the years, as well as reduce the noise the structure could create in high winds.

We used a total of twelve roofing panels, and put them in place always reaching over the loose one at the end to put all screws in place. Once a new pannel was lifted in place, the previous one could no longer be reached on the top side. The screws were recommended for pre-drilling, but I had a much easier time putting the very pointy screws through the panels than a comparatively blunt drill. We didn’t experience any cracks during installation, and the panels seemed rather soft and not brittle, so that I am not too afraid about cracking around the screws in hot or cold weather.


With all that done, we also installed a light with motion detector in the carport.
All that was left now was re-landscaping by moving our huge pile of topsoil to the sides of the concrete base. It would have taken me ages to straighten the soil out so it looks good, but on these occasions my Dad’s expertise as landscape gardener comes in extremely handy. Still, it took us almost a whole day to move the soil back that Tallmadge Asphalt and Concrete had removed with their Bobcat in a few minutes!

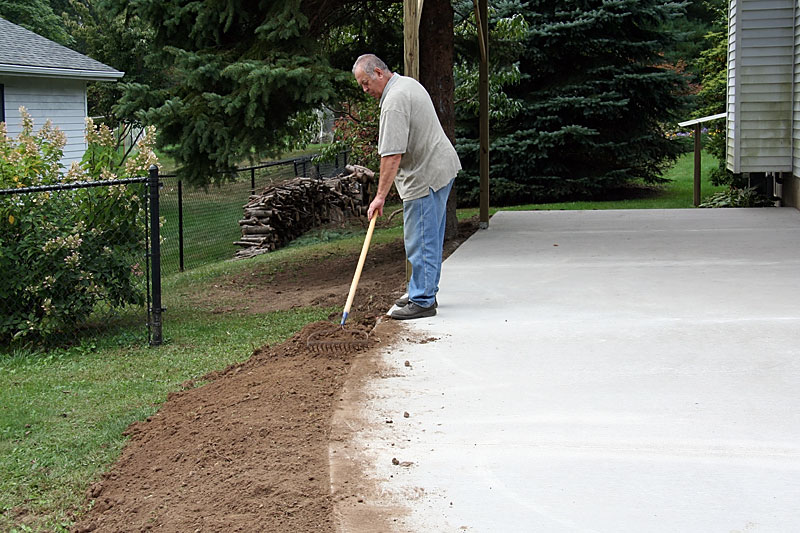
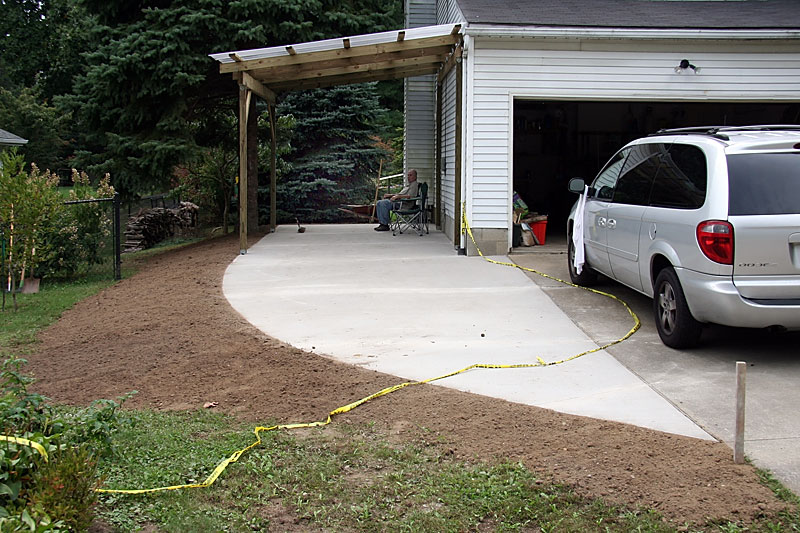
Last but not least, we sowed some grass, which came up like crazy thanks to all the rain in fall 2009.

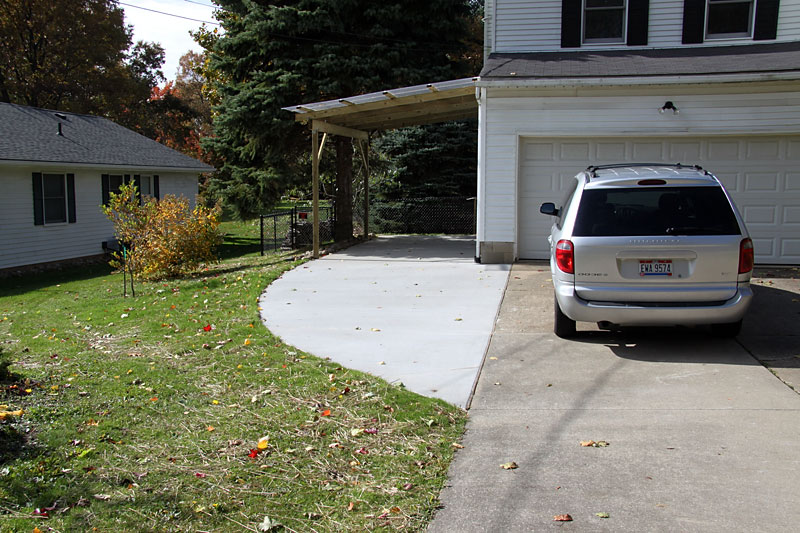
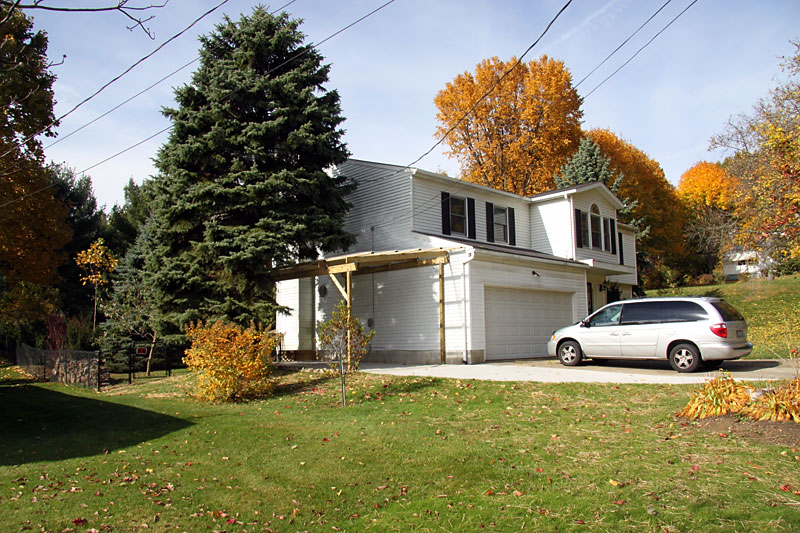
This is the final product with the old fence removed and the fence closed again – which was another DIY project all in itself 🙂
Leave a Reply
You must be logged in to post a comment.
